
![]()
![]()
Standard Suite
Extensions & Plugins
Power Suite
Apps & Tools

A powerful, versatile, compact, super fast, feature rich and remarkably simple to use module to lay out, render and edit high-quality Unicode text on any device, platform or operating system.
30-Day Evaluation
(Windows, Mac, Linux)![]()
![]()
![]()

Release 9.0
See What's New
D-Type Unicode Text Module is a portable C/C++ library for laying out, rendering and editing high-quality Unicode text. It is designed to be powerful, fast, flexible, elegant and above all extremely easy to use. With only a few key functions, it allows application developers to easily create, format, lay out and render text in virtually any Unicode script and language and handle cursor positioning, selection highlighting and text editing.
D-Type Unicode Text Module is written in industry standard C++ and is portable to virtually any hardware or operating system environment. The module is available in a binary form (as a static and/or dynamic/shared library) that is suitable for quick deployment on Windows, Linux, macOS, iOS, Android, Windows Phone, Windows RT, XBox, Raspberry Pi and/or Zealz GK802 Mini PC or, alternatively, licensed in source form on any platform. Although D-Type Unicode Text Module is written entirely in C++, it features a C-style public API (Application Programming Interface). This is to ensure that the library's functions can be called from a variety of programming languages and development frameworks in use today.
D-Type Unicode Text Module is a module for D-Type PowerDoc Engine. Other than D-Type PowerDoc Engine itself, this module does not require any other third party libraries or fonts to be installed in order to function properly.
Text layout and rendering that incorporates advanced styling and formatting, bidirectional text support, font handling, various Unicode algorithms, contextual shaping, cursor handling, selection highlighting and automatic text flow is a very complex task. Most programmers don't have the necessary skills, knowledge, know-how and time to develop and maintain their own text composition engines. D-Type Unicode Text Module is currently the only product of this kind available on the market. No other library can match the performance, quality, flexibility, portability, reliability, technical elegance and simplicity of D-Type Unicode Text Module.
Before we can start using D-Type Unicode Text Module, we need to initialize its PowerDoc Engine. We do this by calling the pdEngineIniViaStream function. This call is usually done only once, at the beginning of the application's initialization routine. Here is one way to do this:
DT_STREAM_FILE(sd, "dtype.inf");

if (pdEngineIniViaStream(&engine, &sd, NULL) == 0) return;
Assuming that the initialization was successful, our rendering engine will be represented by the engine variable. We can now proceed to Step 1.
Once we have initialized the rendering engine, we are ready to create a new Unicode text document (or as many of them as we need). Here is one way to do this:
DT_STREAM_FILE(sd, "C:\\TextFiles\\sample.txt");

if (txTextIniViaStream(&text_doc, engine, TX_AUTO, &sd,
                       TX_IMPORT_UNICODE_BIDI | TX_IMPORT_UNICODE_SCRIPT,
                       NULL, NULL, NULL) < 0) return;
Basically, we simply call the txTextIniViaStream function. This function creates for us a sample text document (represented by the text_doc variable) by reading plain UTF-8 text stored in the sample.txt file on our hard disk. We typically pass the TX_IMPORT_UNICODE_BIDI and TX_IMPORT_UNICODE_SCRIPT flags to indicate that we want to apply Unicode's implicit bidirectional reordering algorithm and auto-detect Unicode scripts (such as Latin, Arabic, Thai etc.) so that complex scripts can be shaped properly.
The above is not the only way to create a new text document. We can do this by getting plain text from memory:
const DT_CHAR* text_utf8 = "Saturn is the most distant of the five planets known to ancient stargazers.";

DT_STREAM_MEMORY(sd, (DT_UBYTE*)text_utf8, strlen(text_utf8));

if (txTextIniViaStream(&text_doc, engine, TX_UTF8, &sd,
                       TX_IMPORT_UNICODE_BIDI | TX_IMPORT_UNICODE_SCRIPT,
                       NULL, NULL, NULL) < 0) return;
or by loading it from a web server (for which we need to specify its URL):
DT_STREAM_URL(sd, "http://www.d-type.com/text/sample.txt");

if (txTextIniViaStream(&text_doc, engine, TX_AUTO, &sd,
                       TX_IMPORT_UNICODE_BIDI | TX_IMPORT_UNICODE_SCRIPT,
                       NULL, NULL, NULL) < 0) return;
At this point, D-Type Unicode Text Module has already performed the bidirectional analysis and reordering, gathered the necessary fonts, processed complex scripts and completed the majority of necessary layout calculations. So it has everything it needs to generate the output. Actually, we could already jump to Step 4 and render our text.
Note: In the above sample code, we used either TX_UTF8 or TX_AUTO to specify the type of text file. These are not the only options. Presently the following types of text are supported:
TX_AUTO      /* Auto-detect */
TX_ANSI      /* Ansi */
TX_UCS2_LE   /* UCS-2 Big Endian */
TX_UCS2_BE   /* UCS-2 Little Endian */
TX_UTF8      /* UTF-8 */
TX_UCS4_LE   /* UCS-4 Little Endian */
TX_UCS4_BE   /* UCS-4 Big Endian */
TX_UTF16_LE  /* UTF-16 Little Endian */
TX_UTF16_BE  /* UTF-16 Big Endian */
TX_UTF32_LE  /* UTF-32 Little Endian */
TX_UTF32_BE  /* UTF-32 Big Endian */
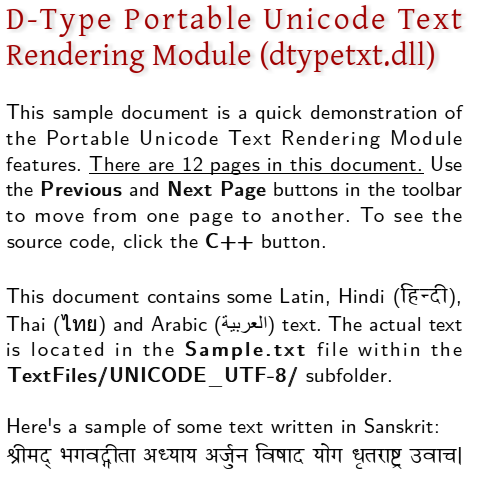
Once our text document has been created, we may want to style it and/or format it. This is an optional step because not all types of applications need to do this. For example, applications that only display plain text (e.g. terminal programs or database applications) can completely skip this step. However, if we want to render rich text, this step is something we will do often.
So, let's say that we want to underline the fragment "There are 12 pages in this document." from our sample.txt file. This fragment begins at character position 166 and ends at character position 202. To apply the underline style, we simply call the txTextSetAttribs function and pass the predefined attrUnderline style to this character range:
txTextSetAttribs(text_doc, 166, 202, attrUnderline, 0);
The result will be as illustrated below:

Similarly, if we want to apply synthetic bold to the words "Previous", "Next Page", "C++", "Sample.txt" and "TextFiles/UNICODE_UTF-8/", we apply the predefined attrBold style:
txTextSetAttribs(text_doc, 211, 219, attrBold, 0); /* "Previous" */
txTextSetAttribs(text_doc, 224, 233, attrBold, 0); /* "Next Page" */
txTextSetAttribs(text_doc, 325, 328, attrBold, 0); /* "C++" */
txTextSetAttribs(text_doc, 463, 473, attrBold, 0); /* "Sample.txt" */
txTextSetAttribs(text_doc, 490, 514, attrBold, 0); /* "TextFiles/UNICODE_UTF-8/" */
The result of this is shown below:
But what if we want to apply a completely unique style? For example, let's say that we want to style the tile of our document using our own font, color and a nice soft drop shadow? No problem, we just create this style ourselves, and then apply it to the title (between character positions 0 and 60) using the same txTextSetAttribs function. Here is one way to do this:
const DT_TX_ATTRIBS myattr_GentiumBigRedWithShadow[] =
{
   {TX_ATTR_FONT_UNIQUEID, "S001N_GENTIR001A" /* Gentium font id */},
   {TX_ATTR_FONT_WIDTH,    "55" /* size in doc units */},
   {TX_ATTR_FONT_HEIGHT,   "55" /* size in doc units */},
   {TX_ATTR_BODY_RGBT,     "A0000000"},
   {TX_ATTR_SHADOW_RGBT,   "CCCCCC00"},
   {TX_ATTR_SHADOW_DX,     "5" /* dx offset in doc units */},
   {TX_ATTR_SHADOW_DY,     "5" /* dy offset in doc units */},
   {TX_ATTR_SHADOW_EP,     "0308" /* effect=03, parameter=08 */},
   {TX_ATTR_END,           "" /* mandatory end-of-array */}
};

txTextSetAttribs(text_doc, 0, 60, myattr_GentiumBigRedWithShadow, 0);
The result:
The choice of the style name is entirely up to us. In the above example, we decided to call it myattr_GentiumBigRedWithShadow but we could have also selected a name that is more appropriate for our application (for example myattr_MainTitle or myattr_HeaderLevel1).
Let's just say that we use the txTextSetAttribs function whenever we need to style or format a run of text. This is true regardless of what style/format we wish to apply or how long the text run is. For example, if we want to justify our entire document (which begins at character position 0 and ends at position 7711), we will proceed in the same way.
txTextSetAttribs(text_doc, 0, 7711, attrJustified, 0);
Finally, the result:
Notice how all the paragraphs are now justified. Also, notice that applying one style (or format) over another existing style (or format) does not destroy that previously applied style (or format). The effect is cumulative.
This step establishes an automatic text flow across linked textflow areas. This is a truly optional step. Not all applications will need or want to do this. However, applications that want to use more than a single textflow area may find this step useful.
The idea here is that a single text document may span multiple textflow areas. The flow of text from one area to another is then handled automatically by D-Type Unicode Text Module. Additionally, each textflow area can have its own independent position, size, page, and even a 3x3 transformation matrix.
The list of textflow areas is defined by creating an array of DT_TX_TEXTFLOW_AREA structures. Each structure represents one textflow area and contains parameters such as the area's (x,y) location (in document units), width and height (in document units), type (rectangular, circular, diamond-like etc.), row spacing calculation method (e.g. typographical or mathematical), global text direction (e.g. Left-to-Right & Top-to-Bottom, Top-to-Bottom & Left-to-Right, Top-to-Bottom & Right-to-Left etc.), bidirectional text display method (bidirectional reordering or bidirectional rotation), device mode (e.g. device dependent, device independent, mixed) and, optionally, a transformation matrix (affine or 2D perspective).
For brevity, we will not describe each of the above parameters in details. These details are available in D-Type technical documentation. Instead, here is some sample code to illustrate the technique. We start by creating a few transformation matrices...
/* affine transform matrix A */
DT_FLOAT tm_2x2_a[4] = {1.0, -0.3, 0.0, 1.4};
/* affine transform matrix B */
DT_FLOAT tm_2x2_b[4] = {1.3, 0.1, -0.4, 0.9};
/* 2D perspective transform matrix A */
DT_FLOAT tm_3x3_a[9] = {0.4, -0.006, -155.0,
                        0.0,  0.555, -120.0,
                        0.0, -0.001,    1.0};
/* 2D perspective transform matrix B */
DT_FLOAT tm_3x3_b[9] = {2.3,   0.0, 0.0,
                        0.0,   1.9, 0.0,
                        0.002, 0.0, 1.0};
...and then we create an array of DT_TX_TEXTFLOW_AREA structures:
DT_TX_TEXTFLOW_AREA textflow_areas[6] =
{
   { 10,  10,  800, 850,  TX_RECT,  TX_TYPOROW, 0, 0, TX_LAY_DEVICE_B,  TX_TM0, NULL},
   {200,  10,  650, 630,  TX_RECT,  TX_TYPOROW, 0, 0, TX_LAY_DEVICE_B,  TX_TM2, tm_2x2_a},
   { 10,  10,  880, 880,  TX_CIRC,  TX_TYPOROW, 0, 0, TX_LAY_DEVICE_B,  TX_TM0, NULL},
   { 10, 280,  600, 690,  TX_RECT,  TX_TYPOROW, 0, 0, TX_LAY_DEVICE_B,  TX_TM2, tm_2x2_b},
   {430, 130,  800, 630,  TX_RECT,  TX_TYPOROW, 0, 0, TX_LAY_DEVICE_B,  TX_TM3, tm_3x3_a},
   { 10,  10, 1400, 480,  TX_RECT,  TX_TYPOROW, 0, 0, TX_LAY_DEVICE_B,  TX_TM3, tm_3x3_b},
};
Once this is done, we simply call the txTextSetFlow function to pass our array to D-Type Unicode Text Module:
txTextSetFlow(text_doc, 6, textflow_areas, 0);
And that's it. The result is 6 linked textflow areas with text flowing from one area to another. The following 6 illustrations demonstrate this:
This is the final step. To draw a textflow area, we first call the txTextSetTransform function to set the transformation matrix for out text document. This matrix allows us to easily scale, stretch, rotate and/or skew our entire text document.
DT_TM2X2 tm = {{1.0, 0.0}, {0.0, 1.0}};
txTextSetTransform(text_doc, tm);
Once the transformation matrix is set, we call the txTextDraw function and specify a few parameters: area which is the index of the textflow area, x and y offset of the textflow area on the screen and format and subformat which identify the type of the memory surface we are rendering to (e.g. grayscale, RGB, RGBA etc.)
DT_MDC dc_mem; /* memory surface to render to */

dc_mem.w = 490;  /* surface width in pixels */
dc_mem.h = 490,  /* surface height in pixels */
dc_mem.m = NULL; /* txTextDraw will allocate bitmap's memory for us */

txTextDraw(text_doc, area, x, y, format, subformat, &dc_mem, NULL, 1);
This will create an RGB image with dimensions of 490x490 pixels. (View the output image.)
In the above example, when we called txTextDraw, we set the last parameter to 1.
txTextDraw(text_doc, area, x, y, format, subformat, &dc_mem, NULL, 1);
This means that in addition to rendering the text, we also want to render the cursor and any highlighted text selections. For example, if a portion of the first paragraph had been selected while performing a text edit operation, the highlighted selection might have appeared as in this illustration:
That's nice, but how do we enable text edit operations? It's quite simple actually. D-Type Unicode Text Module provides a few functions to process mouse actions and text commands. For example, we can call the txTextHit function when the user clicks inside (or outside) a textflow area.
txTextHit(text_doc, hit_type, x, y, &extent, flags);
The x and y parameters represent the (x,y) location of the mouse on the screen. The hit_type parameter is the type of mouse action and can be one of the following:
TX_HIT_RELEASE       /* Mouse button released */
TX_HIT_MOVE          /* Mouse move */
TX_HIT_NORMAL        /* Normal mouse button click */
TX_HIT_DOUBLE        /* Double mouse button click - selects a word */
TX_HIT_TRIPLE        /* Triple mouse button click - selects a paragraph */
TX_HIT_SHIFT         /* Mouse button click with the Shift key */
TX_HIT_CTRL          /* Mouse button click with the Ctrl key */
TX_HIT_ALT           /* Mouse button click with the Alt key */
TX_HIT_CTRLALT       /* Mouse button click with the Ctrl+Alt key */
When called, the txTextHit function will interpret the action as required. This may result in a cursor movement, selection highlighting or any other text edit operation that a mouse action can invoke. However, the end-user application does not need to know what operation, if any, was invoked.
The only thing that the txTextHit function returns is the extent parameter. This is a rectangle that describes the smallest enclosing box of the screen area that needs to be repainted following a text edit operation. After that, we can call txTextDraw again and repaint the area defined by extent. It's that simple.
Now, txTextHit is not the only function that can invoke text edit operations. We also have txTextCommand and txTextSetSelect. The first one, txTextCommand, allows us to send various text commands to D-Type Unicode Text Module and looks as follows:
txTextCommand(text_doc, command, &extent, flags);
Here the command parameter identifies the text command we wish to send and presently can be one of the following:
TX_CMD_RESET /* Deselect all text and remove cursor */
TX_CMD_SELECTWORD                 /* Select entire word */
TX_CMD_SELECTWORDS                /* Select entire words (extend existing selections) */
TX_CMD_SELECTLINE                 /* Select entire line */
TX_CMD_SELECTPARAGRAPH            /* Select entire paragraph */
TX_CMD_SELECTPARAGRAPHS           /* Select entire paragraphs (extend existing selections) */
TX_CMD_SELECTAREA                 /* Select entire text area */
TX_CMD_SELECTTEXT                 /* Select all text */
TX_CMD_LEFT                       /* Go to previous visible character */
TX_CMD_RIGHT                      /* Go to next visible character */
TX_CMD_UP                         /* Go to previous row */
TX_CMD_DOWN                       /* Go to next row */
TX_CMD_SHIFT_LEFT                 /* Shift + Go to previous visible character */
TX_CMD_SHIFT_RIGHT                /* Shift + Go to next visible character */
TX_CMD_SHIFT_UP                   /* Shift + Go to previous row */
TX_CMD_SHIFT_DOWN                 /* Shift + Go to next row */

TX_CMD_SET                        /* Set cursor to closest visible position */
TX_CMD_CURRCHAR                   /* Go to current character */

TX_CMD_PREVCHAR                   /* Go to previous character */
TX_CMD_PREVWORD                   /* Go to previous word */
TX_CMD_PREVLINE                   /* Go to previous text line */
TX_CMD_PREVPARAGRAPH              /* Go to previous paragraph */
TX_CMD_PREVAREA                   /* Go to previous text area */
TX_CMD_NEXTCHAR                   /* Go to next character */
TX_CMD_NEXTWORD                   /* Go to next word */
TX_CMD_NEXTLINE                   /* Go to next text line */
TX_CMD_NEXTPARAGRAPH              /* Go to next paragraph */
TX_CMD_NEXTAREA                   /* Go to next text area */

TX_CMD_SHIFT_PREVCHAR             /* Shift + Go to previous character */
TX_CMD_SHIFT_PREVWORD             /* Shift + Go to previous word */
TX_CMD_SHIFT_PREVLINE             /* Shift + Go to previous text line */
TX_CMD_SHIFT_PREVPARAGRAPH        /* Shift + Go to previous paragraph */
TX_CMD_SHIFT_PREVAREA             /* Shift + Go to previous text area */
TX_CMD_SHIFT_NEXTCHAR             /* Shift + Go to next character */
TX_CMD_SHIFT_NEXTWORD             /* Shift + Go to next word */
TX_CMD_SHIFT_NEXTLINE             /* Shift + Go to next text line */
TX_CMD_SHIFT_NEXTPARAGRAPH        /* Shift + Go to next paragraph */
TX_CMD_SHIFT_NEXTAREA             /* Shift + Go to next text area */

TX_CMD_STARTWORD                  /* Go to start of word */
TX_CMD_STARTLINE                  /* Go to start of text line */
TX_CMD_STARTPARAGRAPH             /* Go to start of paragraph */
TX_CMD_STARTAREA                  /* Go to start of text area */
TX_CMD_STARTTEXT                  /* Go to start of text */
TX_CMD_ENDWORD                    /* Go to end of word */
TX_CMD_ENDLINE                    /* Go to end of text line */
TX_CMD_ENDPARAGRAPH               /* Go to end of paragraph */
TX_CMD_ENDAREA                    /* Go to end of text area */
TX_CMD_ENDTEXT                    /* Go to end of text */

TX_CMD_SHIFT_STARTWORD            /* Shift + Go to start of word */
TX_CMD_SHIFT_STARTLINE            /* Shift + Go to start of text line */
TX_CMD_SHIFT_STARTPARAGRAPH       /* Shift + Go to start of paragraph */
TX_CMD_SHIFT_STARTAREA            /* Shift + Go to start of text area */
TX_CMD_SHIFT_STARTTEXT            /* Shift + Go to start of text */
TX_CMD_SHIFT_ENDWORD              /* Shift + Go to end of word */
TX_CMD_SHIFT_ENDLINE              /* Shift + Go to end of text line  */
TX_CMD_SHIFT_ENDPARAGRAPH         /* Shift + Go to end of paragraph */
TX_CMD_SHIFT_ENDAREA              /* Shift + Go to end of text area */
TX_CMD_SHIFT_ENDTEXT              /* Shift + Go to end of text */
As before, the extent parameter is a rectangle that describes the smallest enclosing box of the screen area that needs to be repainted.
The second function, txTextSetSelect, is a little bit more explicit. This function allows us to set a text selection. The function is as follows:
txTextSetSelect(text_doc, first_char[], last_char[], array_len, &extent, flags);
Here first_char and last_char is an array of start and end positions of the selected character range(s) while extent has the same meaning as before.
Finally, we have two more functions: txTextGetSelect and txTextCopy. The txTextGetSelect function allows us to retrieve an array of start and end positions of the currently selected character range(s) and looks as follows:
txTextGetSelect(text_doc, first_char[], last_char[], max_array_len);
The txTextCopy function allows us to extract plain text from the currently selected character range(s) and copy it to a user-supplied buffer. The function looks as follows:
txTextCopy(text_doc, buffer, max_buffer_len, buffer_format);
And finally the txTextPaste function allows us to paste another Unicode text document into the currently selected character range. This function looks as follows:
txTextPaste(text_doc, text_doc2, flags);
Here text_doc is the destination text document and text_doc2 is the source text document.